
- Sun 22 November 2026
- 60 min read
- Linux
- #linux, #linux-foundationals, #fedora, #rhel, #storage, #block-layer, #device-mapper, #luks, #tpm2, #systemd-cryptenroll, #btrfs, #zram, #swap, #systemd-oomd, #memory
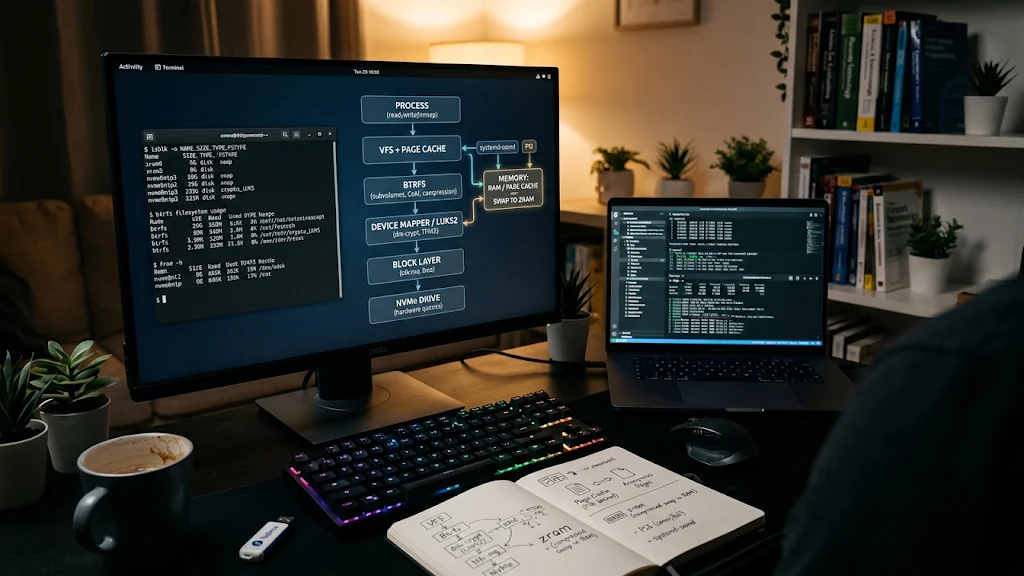
At the end of part 1, systemd had done a switch_root and was running from “the real root filesystem”. That phrase hid a lot. On a default Fedora install, the root filesystem is a subvolume of a Btrfs pool, which lives on a device-mapper device, which decrypts a LUKS2 container, which sits on a partition of an NVMe drive. And the swap device that showed up in the dependency tree wasn’t a disk at all.
This is the second article in the Linux Foundationals series. It covers the two resources every process on the system competes for: storage and memory. They belong together more than it seems at first. The page cache is where the filesystem and the memory manager meet, swap is storage used as memory, and zram is memory used as storage used as memory.
The reference system is again Fedora 45, and this is the part of the series where Fedora and RHEL differ the most. RHEL has no Btrfs and installs XFS on LVM instead. It also doesn’t enable zram swap or systemd-oomd by default. The block layer, device mapper, LUKS2, systemd-cryptenroll and everything about how the kernel manages memory apply to both, so I’ll point out the differences where they matter.
By the end of this article you’ll know what happens between a read() call and the NVMe drive, how LUKS2 stores its keys and what a TPM2 enrollment does and doesn’t protect against, why df is the wrong tool on Btrfs, how to check what compression really saves you, what “free memory” means on Linux, and who decides which process dies when memory runs out.
Table of Contents
- Table of Contents
- The Storage Stack at a Glance
- The Block Layer
- Device Mapper
- LUKS2: Encryption at the Block Level
- TPM2 Auto-Unlock with systemd-cryptenroll
- The VFS: One Tree, Many Filesystems
- Btrfs on Fedora
- Memory: Page Cache and Anonymous Pages
- Swap on zram
- Measuring Memory Pressure: PSI
- Out of Memory: The Kernel OOM Killer and systemd-oomd
- Cheat Sheet
- Common Pitfalls
- Conclusion
- References
The Storage Stack at a Glance
Every layer in the storage stack presents the same simple interface to the layer above it and hides how it’s implemented. On my laptop, a read from a file in /home passes through these layers:
┌────────────────────────┐
│        process         │  read(), write(), mmap()
└───────────┬────────────┘
            │ system call
┌───────────┴────────────┐
│          VFS           │  dentries, inodes, mount table,
│      + page cache      │  cached file contents
└───────────┬────────────┘
            │ only on a cache miss
┌───────────┴────────────┐
│         Btrfs          │  subvolumes "root" and "home",
│                        │  CoW, checksums, zstd compression
└───────────┬────────────┘
            │ block I/O (bio) to /dev/mapper/luks-03ef...
┌───────────┴────────────┐
│     device mapper      │  dm-crypt target:
│        (dm-0)          │  AES-XTS, key from the LUKS2 header
└───────────┬────────────┘
            │ same bio, remapped to /dev/nvme0n1p3
┌───────────┴────────────┐
│      block layer       │  partitions, request queues (blk-mq),
│                        │  I/O scheduler
└───────────┬────────────┘
            │
┌───────────┴────────────┐
│      NVMe driver       │  hardware queues, one per CPU
└───────────┬────────────┘
            │
        the drive
I’ll go through this from the bottom up, because that’s the order in which the layers come into existence during boot: the kernel finds the drive, the initramfs unlocks the LUKS container, the root subvolume gets mounted. Memory comes after that, starting at the place where both worlds meet: the page cache.
The Block Layer
A block device is the kernel’s abstraction for anything that stores data in fixed-size, randomly addressable blocks. lsblk shows all of them as a tree:
lsblk -o NAME,SIZE,TYPE,FSTYPE,MOUNTPOINTS
NAME               SIZE TYPE  FSTYPE      MOUNTPOINTS
zram0                8G disk  swap        [SWAP]
nvme0n1          953.9G disk
├─nvme0n1p1        600M part  vfat        /boot/efi
├─nvme0n1p2          1G part  ext4        /boot
└─nvme0n1p3      952.3G part  crypto_LUKS
  └─luks-03ef... 952.3G crypt btrfs       /home
                                          /
That’s the layout from part 1, now with types. There’s one physical disk (nvme0n1) with three partitions, one crypt device stacked on top of the third partition, and a second “disk” called zram0 that has no hardware behind it. The Btrfs filesystem on the crypt device is mounted twice, at / and at /home. All three of these facts get their own section below.
Names you can rely on
Kernel names like nvme0n1 or sda depend on the order in which drivers find devices. With more than one disk, they’re not guaranteed to be stable across boots. That’s why nothing in the boot chain uses them. The BLS entry from part 1 said root=UUID=5c88..., and /etc/fstab does the same:
UUID=5c88...  /          btrfs  subvol=root,compress=zstd:1,x-systemd.device-timeout=0  0 0
UUID=9faf...  /boot      ext4   defaults                                                1 2
UUID=943A-9AB3  /boot/efi  vfat   umask=0077,shortname=winnt                            0 2
UUID=5c88...  /home      btrfs  subvol=home,compress=zstd:1,x-systemd.device-timeout=0  0 0
udev maintains the stable names as symlinks under /dev/disk/:
ls /dev/disk/
# by-diskseq  by-id  by-label  by-partlabel  by-partuuid  by-path  by-uuid

# Filesystem UUIDs and labels of everything, read from the superblocks
lsblk -f
sudo blkid
by-uuid and by-label come from the filesystem superblock, by-partuuid and by-partlabel from the GPT, by-id from the hardware’s model and serial number, and by-path from the physical connection. For anything you write into a configuration file, use one of these, never the kernel name.
bios, queues and schedulers
Inside the kernel, every I/O request to a block device is a bio: a small structure that says “read (or write) these memory pages from (or to) this sector range on this device”. Filesystems create bios, stacking drivers like device mapper remap them, and at the bottom the block layer turns them into requests for the hardware driver.
Since kernel 5.0, there’s only one way requests reach a driver: the multi-queue block layer, blk-mq. It has per-CPU software queues that feed into one or more hardware queues. For an NVMe drive, which brings many hardware queues of its own, a request goes from the CPU that issued it almost straight to the device. Between the two sits the optional I/O scheduler:
cat /sys/block/nvme0n1/queue/scheduler
# [none] mq-deadline kyber bfq
The value in brackets is the active one, and for NVMe it’s none. That isn’t an oversight. A scheduler reorders and merges requests to make the best of a slow device, and a drive that answers in microseconds gains nothing from that except CPU overhead. For slower devices, Fedora ships a udev rule (60-block-scheduler.rules) that selects bfq for SATA and SAS disks, SD cards and eMMC, where fair queueing between processes makes a noticeable difference in desktop responsiveness.
| Scheduler | Idea | Typical use |
|---|---|---|
none |
No reordering, straight to the hardware queues | NVMe, fast virtual disks |
mq-deadline |
Guarantees a maximum latency per request, prefers reads | SATA SSDs, servers |
bfq |
Fair budgets per process, low latency for interactive tasks | Rotating disks, SD cards, desktops |
kyber |
Throttles queues to hit latency targets | Fast devices under mixed load |
The rest of /sys/block/<device>/queue/ describes what the device told the kernel about itself: rotational (0 for flash), logical_block_size, discard_granularity (non-zero if it supports TRIM) and more. To watch a device at work, iostat from the sysstat package is still the standard tool:
# Extended statistics, one line per device, every 2 seconds
iostat -x 2
Look at r_await and w_await (average time per request in milliseconds) and aqu-sz (average queue length) rather than at %util, which is meaningless for devices that process many requests in parallel.
Device Mapper
The block layer has a framework for building virtual block devices out of other block devices: device mapper. A device-mapper device is defined by a table. Each line maps a range of sectors of the virtual device to a target, a kernel module that decides what happens to bios in that range.
That’s a small idea with large consequences, because almost everything in Linux storage that isn’t a filesystem is built on it:
| Target | What it does | Who uses it |
|---|---|---|
linear |
Maps a range to a range on another device | LVM logical volumes |
striped |
Spreads data over several devices | LVM striping |
crypt |
Encrypts and decrypts every bio | LUKS, plain dm-crypt |
thin, thin-pool |
Thin provisioning and snapshots | LVM thin pools, Stratis |
raid |
Wraps the MD RAID personalities | LVM RAID |
multipath |
Several paths to the same SAN LUN | multipathd |
verity |
Read-only integrity checking against a hash tree | Android, image-based systems |
integrity |
Per-sector checksums | LUKS2 with integrity |
LVM, LUKS and multipath are not three subsystems. They’re three userspace tools (lvm, cryptsetup, multipathd) that write tables for the same kernel framework. That’s also why they stack in any order: a dm device is a block device, so it can be the backing device of another dm device.
On my laptop there’s exactly one dm device, and you can look at its table:
sudo dmsetup ls --tree
sudo dmsetup table
luks-03ef... (252:0)
 └─ (259:3)

luks-03ef...: 0 1997047808 crypt aes-xts-plain64 :64:logon:cryptsetup:03ef...-d0 0 259:3 32768 1 allow_discards
Read the table line from left to right: starting at sector 0, for 1997047808 sectors (952.3 GiB), use the crypt target with the cipher aes-xts-plain64. The key is 64 bytes long and isn’t printed, it’s referenced from the kernel keyring. The backing device is 259:3 (major and minor number of nvme0n1p3), and the encrypted data starts at sector 32768 of that partition. The first 16 MiB before that offset are the LUKS2 header. allow_discards means TRIM requests from the filesystem are passed down to the drive.
The device shows up as /dev/dm-0, and udev creates the readable name /dev/mapper/luks-03ef... as a symlink to it. With rootflags=subvol=root and this device, the kernel command line from part 1 is now completely explained.
On a RHEL system, the same commands show one linear table per logical volume (rhel-root, rhel-swap, rhel-home). The principle is identical.
LUKS2: Encryption at the Block Level
dm-crypt does the encryption, but it knows nothing about passphrases. It takes a raw key and encrypts sectors. LUKS (Linux Unified Key Setup) is the on-disk format that solves key management, and cryptsetup is the tool that reads it and sets up the dm-crypt table.
The central idea of LUKS is that your passphrase never encrypts your data. The data is encrypted with a random volume key, generated once when the container is created. The volume key is stored in the header, encrypted separately for each keyslot. Every keyslot holds its own copy of the volume key, wrapped with a key derived from one passphrase (or one token).
/dev/nvme0n1p3
┌──────────────────────────────────────────────────────────────┐
│ LUKS2 header (16 MiB)                                        │
│ ┌──────────────────────────────────────────────────────────┐ │
│ │ binary header + JSON metadata (stored twice)             │ │
│ │   keyslots: 0 → argon2id, 1 → pbkdf2                     │ │
│ │   tokens:   0 → systemd-fido2, points at keyslot 1       │ │
│ │   segments: 0 → aes-xts-plain64, offset 16 MiB           │ │
│ ├──────────────────────────────────────────────────────────┤ │
│ │ keyslot area: the volume key, encrypted once per keyslot │ │
│ └──────────────────────────────────────────────────────────┘ │
├──────────────────────────────────────────────────────────────┤
│ encrypted data (the Btrfs filesystem), sector by sector      │
└──────────────────────────────────────────────────────────────┘
This design has three practical consequences:
- Changing a passphrase is instant. Only one keyslot is rewritten, not 950 GiB of data.
- Several ways to unlock can coexist. A passphrase in slot 0, a TPM2-sealed key in slot 1, a recovery key in slot 2. Any one of them opens the container.
- The header is everything. If the header is destroyed, the volume key is gone, and no passphrase in the world brings the data back.
cryptsetup luksDump shows the header in readable form. Here’s the one from my laptop, with the salts, the digest and the credential data cut out:
sudo cryptsetup luksDump /dev/nvme0n1p3
LUKS header information
Version:        2
Epoch:          5
Metadata area:  16384 [bytes]
Keyslots area:  16744448 [bytes]
UUID:           03ef...
Label:          (no label)
Subsystem:      (no subsystem)
Flags:          (no flags)

Data segments:
  0: crypt
        offset: 16777216 [bytes]
        length: (whole device)
        cipher: aes-xts-plain64
        sector: 512 [bytes]

Keyslots:
  0: luks2
        Key:        512 bits
        Priority:   normal
        Cipher:     aes-xts-plain64
        Cipher key: 512 bits
        PBKDF:      argon2id
        Time cost:  7
        Memory:     1048576
        Threads:    4
        Salt:       ...
        AF stripes: 4000
        AF hash:    sha256
        Area offset:32768 [bytes]
        Area length:258048 [bytes]
        Digest ID:  0
  1: luks2
        Key:        512 bits
        Priority:   normal
        Cipher:     aes-xts-plain64
        Cipher key: 512 bits
        PBKDF:      pbkdf2
        Hash:       sha512
        Iterations: 1000
        Salt:       ...
        AF stripes: 4000
        AF hash:    sha512
        Area offset:290816 [bytes]
        Area length:258048 [bytes]
        Digest ID:  0
Tokens:
  0: systemd-fido2
        fido2-credential:
                    ...
        fido2-salt: ...
        fido2-rp:   io.systemd.cryptsetup
        fido2-clientPin-required:
                    true
        fido2-up-required:
                    true
        fido2-uv-required:
                    false
        Keyslot:    1
Digests:
  0: pbkdf2
        Hash:       sha256
        Iterations: 372893
        Salt:       ...
        Digest:     ...
A few things are worth pointing out. The data segment starts at an offset of 16777216 bytes, which is the sector 32768 from the dm table. The key is 512 bits because XTS mode splits it into two 256-bit AES keys.
Keyslot 0 is my passphrase. It uses Argon2id as its key derivation function, with a memory cost of 1 GiB: every single passphrase guess costs an attacker a gigabyte of RAM and a noticeable amount of time, which makes brute-forcing on GPUs impractical. That’s also the reason unlocking takes a second or two even with the right passphrase.
Keyslot 1 looks alarmingly weak in comparison: plain PBKDF2 with only 1000 iterations. It isn’t, and the reason is in the Tokens: section. Token 0 is of type systemd-fido2 and points at keyslot 1. The key for this slot doesn’t come from a human. It’s a random secret that a FIDO2 security key computes from the stored credential and salt, and only after I’ve entered the token’s PIN (clientPin-required) and touched it (up-required, user presence). A key with that much entropy doesn’t need stretching, so systemd uses the cheapest KDF setting there is. This is the keyslot I use every day. The passphrase in slot 0 is the fallback.
The digest at the end is how cryptsetup knows that a keyslot produced the right result: it’s a hash of the volume key, and both keyslots refer to it with Digest ID: 0. Both slots unlock the same volume key.
Everyday cryptsetup
# Add a second passphrase (asks for an existing one first)
sudo cryptsetup luksAddKey /dev/nvme0n1p3

# Change the passphrase of a keyslot
sudo cryptsetup luksChangeKey /dev/nvme0n1p3

# Remove a keyslot
sudo cryptsetup luksKillSlot /dev/nvme0n1p3 2

# Check which keyslot a passphrase opens, without opening anything
sudo cryptsetup open --test-passphrase --verbose /dev/nvme0n1p3

# Status of the active mapping
sudo cryptsetup status luks-03ef...
And the one command everyone with an encrypted disk should have run once:
sudo cryptsetup luksHeaderBackup /dev/nvme0n1p3 \
    --header-backup-file /run/media/user/backup/luks-header-nvme0n1p3.img
The target here is a mounted USB stick, on purpose. The backup contains the keyslots, so it’s exactly as sensitive as the disk itself: whoever has it and a valid passphrase can open the container, even after you’ve changed that passphrase on the live disk. Store it offline, not on the disk it belongs to.
How the container gets opened at boot
In part 1, a unit called systemd-cryptsetup@luks\x2d03ef....service appeared below cryptsetup.target. Now it’s clear where it comes from. Two sources describe which containers to open:
- The kernel command line:
rd.luks.uuid=luks-03ef...tells the initramfs that this container is needed for the root filesystem. /etc/crypttab: the table of encrypted devices, the counterpart to/etc/fstab.
# /etc/crypttab
# <name>       <device>     <keyfile>  <options>
luks-03ef...   UUID=03ef...  none       discard
systemd-cryptsetup-generator is another generator like the fstab generator from part 1. It turns both sources into systemd-cryptsetup@.service instances, in the initramfs and on the running system. none in the third column means “ask for a passphrase”, and discard is where the allow_discards flag in the dm table came from. Dracut copies the relevant lines of /etc/crypttab into the initramfs, which is why part 1 listed it among the files that require a dracut -f after changes.
A word on discard: passing TRIM through an encrypted device reveals to someone with access to the raw disk which sectors are unused. For a laptop SSD that trade is almost always worth it, since the drive needs the information for wear leveling and performance. If you need to hide even the fill level of a disk, leave it out.
TPM2 Auto-Unlock with systemd-cryptenroll
Typing a long passphrase on every boot is the price of disk encryption, and on servers it’s often a price nobody can pay, because nobody is standing in front of the machine. The TPM2 chip that practically every machine of the last decade contains offers a way out: let the hardware hold the key, and let it release the key only if the machine booted the way you expect.
Measured boot and PCRs
Part 1 explained that Secure Boot verifies: each stage refuses to start the next one if the signature is wrong. In parallel, a second mechanism measures: each stage hashes the next one and sends the hash to the TPM before executing it. The TPM stores these measurements in Platform Configuration Registers (PCRs).
A PCR can’t be written, only extended: the new value is the hash of the old value concatenated with the new measurement. That makes a PCR a fingerprint of the entire sequence of things measured into it since power-on. There’s no way to set a PCR to a chosen value, and no way to undo a measurement without a reboot.
| PCR | What gets measured into it |
|---|---|
| 0 | Firmware code |
| 1 | Firmware configuration (setup options, boot order) |
| 2, 3 | Option ROMs and their configuration |
| 4 | Boot loader code: every EFI binary that gets executed (shim, GRUB) |
| 5 | GPT partition table |
| 7 | Secure Boot state: on or off, PK, KEK, db, dbx, and the certificates used to verify the boot binaries |
| 8 | GRUB: commands and the kernel command line |
| 9 | GRUB: every file it reads, including kernel and initramfs |
| 11 | Unified Kernel Images: kernel, initrd and command line, measured by systemd-stub |
| 14 | shim: the MOK certificates |
You can look at the current values:
systemd-analyze has-tpm2
sudo systemd-analyze pcrs
The TPM can seal a secret against a policy such as “PCR 7 must have exactly this value”. It will then only hand the secret back while that’s true. systemd-cryptenroll uses this to store a LUKS key: it generates a random key, adds it to a new LUKS keyslot, seals it with the TPM, and stores the sealed blob together with the policy as a token in the LUKS2 header. Nothing secret is stored outside the TPM in usable form, and the sealed blob is useless on any other machine.
Enrolling the TPM
The enrollment is a single command:
sudo systemd-cryptenroll --tpm2-device=auto --tpm2-pcrs=7 --tpm2-with-pin=yes /dev/nvme0n1p3
🔐 Please enter current passphrase for disk /dev/nvme0n1p3: ••••••••••••••••
🔐 Please enter TPM2 PIN: ••••••
🔐 Please enter TPM2 PIN (repeat): ••••••
New TPM2 token enrolled as key slot 2.
Three options matter here:
--tpm2-device=autopicks the only TPM in the machine.--tpm2-pcrs=7binds the key to the Secure Boot state. Pay attention to this one: in current systemd versions the default is to bind to no PCRs at all. Without the option, the TPM releases the key on this machine no matter what was booted.--tpm2-with-pin=yesadditionally requires a PIN. More on why in a moment.
Existing keyslots aren’t touched. On a container like mine, with a passphrase in slot 0 and a FIDO2 token in slot 1, the TPM2 key goes into slot 2. Running the tool without options lists what’s enrolled:
sudo systemd-cryptenroll /dev/nvme0n1p3
SLOT TYPE
   0 password
   1 fido2
   2 tpm2
The last step is telling systemd-cryptsetup to use the TPM at boot, with one more option in /etc/crypttab:
luks-03ef... UUID=03ef... none discard,tpm2-device=auto
Then rebuild the initramfs, so the new crypttab and the TPM2 libraries end up in it:
sudo dracut -f
lsinitrd -m /boot/initramfs-$(uname -r).img | grep tpm2
# tpm2-tss
Current dracut versions pull in the tpm2-tss module by themselves as soon as crypttab contains tpm2-device=. The drop-in from part 1 (add_dracutmodules+=" tpm2-tss ") forces it and doesn’t hurt.
On the next boot, the passphrase prompt is replaced by a short PIN prompt, or by no prompt at all if you enrolled without a PIN.
What this protects against, and what it doesn’t
This is the part most tutorials skip, and it’s the most important one.
Without a PIN, bound to PCR 7 only, the disk unlocks whenever this machine boots with Secure Boot in the same state and with the same set of trusted certificates. That protects against someone removing the drive, and against someone booting with Secure Boot switched off. It does not protect a stolen laptop very well, for two reasons:
- PCR 7 doesn’t say which signed operating system was booted, only which certificate verified it. A Fedora live USB stick boots through the same Microsoft-signed shim with the same Fedora certificate, ends up with the same PCR 7 value, and can ask the TPM for the key.
- As part 1 pointed out, Secure Boot doesn’t cover the initramfs or the kernel command line, and neither does PCR 7. Both live on the unencrypted
/bootpartition. Someone with physical access can modify the initramfs to save the key after the TPM has released it.
Without a PIN, the machine also boots all the way to the login screen by itself. From then on, the only thing between an attacker and your data is the login prompt and every network service the machine runs, while the decryption key sits in RAM.
Binding to more PCRs closes these holes on paper. PCR 9 covers the kernel and the initramfs, PCR 8 the command line. In practice, these values change with every kernel update, so the TPM refuses the key after each one and you’re back to typing the passphrase and re-enrolling. Nobody keeps that up for long.
A PIN changes the picture. The TPM only releases the key if the PCRs match and the PIN is correct, and it enforces a lockout after too many wrong attempts in hardware. This is why a six-digit PIN in a TPM can be stronger than a mediocre passphrase without one: the passphrase can be attacked offline with as much hardware as the attacker can afford, the PIN can’t be attacked offline at all. For a laptop, TPM2 with PIN is the combination I’d recommend. For a server in a locked rack, where the realistic threat is a decommissioned or stolen disk, TPM2 without PIN is a reasonable trade.
The proper fix for the unverified initramfs is the one part 1 already named: Unified Kernel Images. With a UKI, kernel, initramfs and command line are measured into PCR 11 as one unit, and the distribution can ship a signed policy that says “any UKI signed by this key is fine”. The TPM key then survives kernel updates without re-enrollment and still doesn’t unlock for a tampered initramfs. That’s a topic for part 8.
When PCR 7 changes
PCR 7 is stable across kernel updates, which is why it’s the usual choice. It does change when the Secure Boot databases change: a dbx revocation update delivered by fwupd, the new Microsoft 2023 certificates being added to db, or someone toggling Secure Boot in the firmware setup. After that, the TPM refuses to unseal, systemd-cryptsetup falls back to asking for the passphrase, and you enroll again:
sudo systemd-cryptenroll --wipe-slot=tpm2 --tpm2-device=auto --tpm2-pcrs=7 --tpm2-with-pin=yes /dev/nvme0n1p3
--wipe-slot=tpm2 removes the old TPM2 keyslot and its token in the same step. This fallback is the reason to never remove the passphrase slot. A mainboard replacement, a firmware update that resets the TPM, or a dead TPM chip all end the same way: without another keyslot the data is gone. If you don’t want to keep a memorable passphrase around, generate a recovery key and store it somewhere safe:
sudo systemd-cryptenroll --recovery-key /dev/nvme0n1p3
It prints a long, high-entropy key (and a QR code) exactly once. The same tool also enrolls FIDO2 tokens with --fido2-device=auto, and as the header dump earlier showed, that’s what I use on my own laptop. The crypttab counterpart is fido2-device=auto. My own crypttab line from above doesn’t carry it, because systemd-cryptsetup also looks for tokens in the LUKS2 header by itself, but stating it explicitly is the documented way and makes the intent visible. If you carry a YubiKey or Nitrokey anyway, it’s a good alternative to the TPM: the secret lives on a device that isn’t stolen together with the laptop, and the PIN and touch requirements are enforced by the token.
To get rid of the TPM enrollment completely, wipe the slot and remove tpm2-device=auto from /etc/crypttab, followed by another dracut -f:
sudo systemd-cryptenroll --wipe-slot=tpm2 /dev/nvme0n1p3
The VFS: One Tree, Many Filesystems
With the container open, there’s a block device with a filesystem on it. Before looking at Btrfs, one layer deserves a short stop: the Virtual File System. It’s the reason cat doesn’t need to know whether a file lives on Btrfs, ext4, NFS or in /proc.
The VFS defines four objects that every filesystem has to provide:
| Object | What it represents |
|---|---|
| superblock | One mounted filesystem instance |
| inode | One file or directory: owner, mode, size, timestamps, where the data is. No name. |
| dentry | A name in a directory, pointing at an inode. This is where hard links come from: two dentries, one inode. |
| file | One open file: an inode plus a position and flags. What a file descriptor refers to. |
When a process calls open("/home/user/notes.txt"), the VFS walks the path component by component through the dentry cache, crosses from one filesystem into another wherever something is mounted, checks permissions (and asks SELinux), and finally calls into the filesystem that owns the inode. Path lookups are so frequent that the dentry cache is one of the most heavily optimized structures in the kernel. It’s also a visible consumer of memory: sudo slabtop usually shows dentry and the filesystems’ inode caches near the top.
The mount table ties the filesystems into one tree. findmnt shows it:
findmnt --real
TARGET        SOURCE                              FSTYPE OPTIONS
/             /dev/mapper/luks-03ef...[/root]     btrfs  rw,relatime,seclabel,compress=zstd:1,ssd,discard=async,space_cache=v2,subvolid=257,subvol=/root
├─/home       /dev/mapper/luks-03ef...[/home]     btrfs  rw,relatime,seclabel,compress=zstd:1,ssd,discard=async,space_cache=v2,subvolid=256,subvol=/home
└─/boot       /dev/nvme0n1p2                      ext4   rw,relatime,seclabel
  └─/boot/efi /dev/nvme0n1p1                      vfat   rw,relatime,fmask=0077,dmask=0077,...
--real hides the two dozen virtual filesystems (proc, sysfs, tmpfs, cgroup2 and friends) that are also mounted on any modern system. Leave it out once to see how much of what looks like files on Linux isn’t stored anywhere. The mount table is also not global: every mount namespace has its own, which is the basis for containers and for systemd’s sandboxing options. That’s part 3.
The second thing the VFS provides is the page cache, the in-memory cache of file contents that sits between every filesystem and the block layer. It gets its own section in the memory half of this article.
Btrfs on Fedora
Fedora has used Btrfs as the default filesystem for desktop installs since Fedora 33. The findmnt output above already shows the two defining features of the default setup: one filesystem mounted twice with different subvol= options, and compress=zstd:1.
If you’ve read the ZFS article in the FreeBSD series, most concepts will be familiar: copy-on-write, checksums on everything, cheap snapshots, a shared pool instead of fixed-size partitions. The implementations and the tooling are very different, and Btrfs has some sharp edges of its own.
Copy-on-write in one paragraph
A traditional filesystem like ext4 or XFS overwrites data in place. Btrfs never does. When a block changes, the new version is written to free space, and then the metadata that points at it is updated, which is again done by writing new metadata blocks, all the way up to the root of the tree. The last step is a single atomic update of the superblock to point at the new root. Until that happens, the old state is fully intact on disk. After a crash, the filesystem is either in the old state or the new one, never in between, and there’s no journal to replay and no fsck at boot.
Everything else follows from this. A snapshot is just a second root pointing at the same tree, so it’s instant and initially takes no space. Checksums for every data and metadata block can be stored in the parent, which makes silent corruption detectable. And a reflink copy of a file shares all of its data blocks with the original until one of them is modified.
Subvolumes
A subvolume is an independent file tree inside a Btrfs filesystem. It looks like a directory, it can be mounted like a filesystem, and it’s the unit that snapshots work on. All subvolumes share the same pool of space.
sudo btrfs subvolume list /
ID 256 gen 569311 top level 5 path home
ID 257 gen 569311 top level 5 path root
ID 258 gen 530397 top level 257 path var/lib/machines
Fedora’s layout is deliberately simple. The top level of the filesystem (always subvolume ID 5) contains two subvolumes, root and home, and nothing else. /etc/fstab mounts them at / and /home, and the IDs match the subvolid= values in the findmnt output above. The top level itself isn’t mounted anywhere. The third subvolume wasn’t created by the installer. It’s nested inside root (top level 257), and it comes from systemd, which creates /var/lib/machines as a subvolume when it finds itself on Btrfs.
What does the split buy you compared to a single tree? Three things:
- No sizing decisions.
/and/homeshare 952 GiB. There’s no “root is full while home has 300 GiB free”, the classic problem of partition and LVM layouts. - Independent snapshots. A snapshot covers exactly one subvolume and stops at nested ones. You can snapshot and roll back the system without touching your home directory, and the other way around.
- Reinstall without losing data. The installer can create a new
rootsubvolume and reuse the existinghome.
It’s the same reasoning that gives a ZFS-on-root FreeBSD system separate datasets for /home and /var/log, just with far fewer of them.
Creating subvolumes of your own doesn’t need root if you own the parent directory:
btrfs subvolume create ~/vm-images
btrfs subvolume show ~/vm-images
A good reason to do that is to exclude something from snapshots: container storage, VM images, build caches.
Snapshots
# A read-only snapshot of the root subvolume
sudo mkdir /.snapshots
sudo btrfs subvolume snapshot -r / /.snapshots/root-before-upgrade

# Delete it again
sudo btrfs subvolume delete /.snapshots/root-before-upgrade
Getting a single file back is a plain cp out of the snapshot directory. Rolling back the whole system is possible too, and part 1 already showed the mechanism: the root subvolume is chosen by rootflags=subvol=root on the kernel command line. Create a writable snapshot from the read-only one, press e in GRUB, change rootflags=subvol= to point at it, and the system boots into the old state.
Three caveats before you rely on that. First, keeping snapshots in /.snapshots inside the root subvolume is fine for getting files back, but awkward for rollbacks. Once you boot into a clone, the original root is no longer mounted at /, and /.snapshots is gone from view until you mount the top level (mount -o subvolid=5) somewhere. Setups that are built for rollback keep their snapshots outside the root subvolume for that reason, either directly in the top level or in a dedicated snapshots subvolume next to root and home. Second, /boot is a separate ext4 partition on Fedora. Kernels and initramfs images aren’t part of any Btrfs snapshot, so a snapshot from before a kernel update needs a kernel that’s still installed. Third, Fedora doesn’t set up any of this automatically. There’s no snapshot before dnf upgrade and no boot menu entry for old states unless you install and configure something like snapper yourself. If you want atomic, bootable system states out of the box, that’s what the image-based Fedora variants are for, and they’re the topic of part 8.
And the obligatory warning: a snapshot lives on the same disk in the same filesystem. It protects against rm -rf and bad upgrades, not against a dead SSD or a lost laptop. btrfs send and btrfs receive can replicate snapshots to another disk, which is the Btrfs building block for a real backup strategy.
Reflinks
The same sharing mechanism works on the level of single files:
cp --reflink=always fedora.qcow2 fedora-test.qcow2
The copy of a 40 GiB image takes a fraction of a second and no additional space, because both files point at the same extents. Only the blocks that later change in one of the two get written separately. Recent versions of cp try this automatically (--reflink=auto is the default), so on Btrfs and XFS you’re probably using reflinks without knowing it.
Why df is the wrong tool
Free space on Btrfs is harder to state than on other filesystems, and df gives you an estimate at best. The reason is two-level allocation. Btrfs first carves the raw device into chunks (typically 1 GiB for data), each dedicated to either data or metadata with a specific redundancy profile. Files are then stored inside chunks. The honest view comes from Btrfs’s own tool:
sudo btrfs filesystem usage /
Overall:
    Device size:                 952.27GiB
    Device allocated:            470.02GiB
    Device unallocated:          482.24GiB
    Device missing:                  0.00B
    Device slack:                    0.00B
    Used:                        351.55GiB
    Free (estimated):            594.62GiB      (min: 353.50GiB)
    Free (statfs, df):           594.62GiB
    Data ratio:                       1.00
    Metadata ratio:                   2.00
    Global reserve:              512.00MiB      (used: 0.00B)
    Multiple profiles:                  no

Data,single: Size:458.01GiB, Used:345.63GiB (75.46%)

Metadata,DUP: Size:6.00GiB, Used:2.96GiB (49.36%)

System,DUP: Size:8.00MiB, Used:80.00KiB (0.98%)
How to read it:
- Device allocated (470 GiB) is how much of the disk has been assigned to chunks. Used (351 GiB) is how much of that actually contains something. The difference is free space inside existing chunks.
- Device unallocated (482 GiB) hasn’t been assigned to anything yet. This is the number to watch.
- Data,single means file contents are stored once. Metadata,DUP means all metadata is stored twice on the same device, hence the metadata ratio of 2.00. If one copy of a metadata block fails its checksum, Btrfs repairs it from the other. For data on a single disk, corruption is detected and reported, but can’t be repaired.
You may have noticed that the two “Free” lines are identical here, so df is telling the truth on this machine. That’s because this is the easy case: one disk, data stored once, and 482 GiB still unallocated. The two numbers drift apart when unallocated space gets close to zero, because df can’t express “there’s room for data but not for metadata”. They also diverge on filesystems with several devices or mixed RAID profiles, where the usable space depends on which profile future chunks are allocated with.
The situation that used to give Btrfs a bad name is a filesystem where all space is allocated but not used: plenty of room in data chunks, no unallocated space left, and the metadata chunks full. Then even deleting a file can fail with “No space left on device”, because deleting needs to write new metadata. Modern kernels reclaim empty and nearly empty chunks automatically, so this has become rare. If you ever get there, a filtered balance compacts data chunks that are less than half full and returns the freed chunks to the unallocated pool:
sudo btrfs balance start -dusage=50 /
Don’t run a full, unfiltered balance as routine maintenance. It rewrites the entire filesystem and helps nothing.
Transparent compression
Fedora mounts with compress=zstd:1: every file is compressed with zstd at level 1 on write and decompressed on read, invisible to applications. Level 1 is the fastest setting, and on anything faster than a SATA SSD it’s chosen so that compression never becomes the bottleneck. On slow storage like SD cards it often makes the system faster, because less data has to cross the slow device.
Btrfs doesn’t blindly compress everything. For each file, it tests the beginning of the data, and if that doesn’t shrink, it marks the file as incompressible and stops trying. Already compressed formats (video, JPEG, archives, most of a browser cache) are therefore stored as they are, at almost no CPU cost.
Regular tools can’t tell you what compression saves. ls and du report uncompressed sizes. The tool for the job is compsize:
sudo dnf install compsize
sudo compsize -x /
sudo compsize -x /home
-x keeps compsize from crossing mount points. Since / and /home are separate mounts, compsize -x / only looks at the root subvolume, so I run it once for each:
# /
Processed 468921 files, 311027 regular extents (365860 refs), 258873 inline, 609368 fragments.
Type       Perc     Disk Usage   Uncompressed Referenced
TOTAL       80%       35G          44G          47G
none       100%       30G          30G          31G
zstd        34%      4.6G          13G          16G
prealloc   100%      168M         168M         112M

# /home
Processed 1625518 files, 1707709 regular extents (1936499 refs), 867091 inline, 2380944 fragments.
Type       Perc     Disk Usage   Uncompressed Referenced
TOTAL       79%      310G         393G         414G
none       100%      280G         280G         282G
zstd        27%       30G         112G         131G
prealloc   100%      162M         162M         321M
Read the first block like this: 30 GiB of data on the root subvolume aren’t compressed and are stored as they are. Another 13 GiB were compressed down to 4.6 GiB, 34% of their original size. In total, 44 GiB of data occupy 35 GiB on disk. prealloc is space that programs reserved with fallocate() and haven’t written yet. Referenced is larger than Uncompressed because of reflinks and snapshots: some extents are referenced more than once.
The two rows tell two different stories. Whatever Btrfs does compress shrinks to about a third on / and to about a quarter on /home, which is a very good result for the cheapest zstd level. But by volume, most of what’s on this disk isn’t compressible at all: photos, video, archives, container layers and VM images all end up in the none row, either because they’re compressed already or because they’re NOCOW files (more on those below). The bottom line for the whole disk is 345 GiB used for 437 GiB of data, so compression saves me a bit over 90 GiB, or about 20%. A system that holds mostly binaries, libraries, source code and logs does far better than that. The numbers depend entirely on what you store.
Changing the settings:
# Try a different level right now (not persistent)
sudo mount -o remount,compress=zstd:3 /home

# Persistent: change compress=zstd:1 in /etc/fstab, then
sudo systemctl daemon-reload

# Per directory: new files below it are compressed even without the mount option
btrfs property set ~/logs compression zstd
Mount options only affect newly written data. Existing files stay as they are until they’re rewritten. btrfs filesystem defragment -r -czstd <path> rewrites them, but be careful: defragmenting breaks the sharing between snapshots and reflinked copies, so on a filesystem with many snapshots it can increase disk usage dramatically.
Checksums and scrub
Every block Btrfs reads is verified against its checksum, and a mismatch results in an I/O error instead of silently wrong data. Blocks that are never read are never checked, though. A scrub reads everything and verifies it:
sudo btrfs scrub start /
sudo btrfs scrub status /

# Error counters per device since the filesystem was created
sudo btrfs device stats /
On a single-disk laptop, scrub can repair metadata (thanks to DUP) and tell you exactly which files have damaged data, which is still far better than finding out when you open them a year later. Fedora doesn’t schedule scrubs. A monthly timer is a sensible addition on any machine whose data you care about.
When copy-on-write hurts
CoW has a cost: a file that’s constantly modified in the middle gets fragmented, because every changed block is written somewhere new. For most files nobody notices. For large files with lots of small random writes, namely VM disk images and database files, it can become a real performance problem on top of the fragmentation that those formats already produce internally.
The escape hatch is the NOCOW attribute:
mkdir ~/vm-images
chattr +C ~/vm-images
lsattr -d ~/vm-images
# ---------------C------ /home/user/vm-images
Files created in that directory from now on are overwritten in place. The attribute only works on empty files, so set it on the directory before putting images there. It’s a trade, not a free win: NOCOW files have no checksums and no compression. libvirt sets the attribute by itself when it creates a storage pool on Btrfs, so for the default /var/lib/libvirt/images you don’t have to do anything.
TRIM
The mount options included discard=async, which Btrfs enables by itself on devices that support it. Freed extents are collected and reported to the drive in batches a little later, which avoids the latency spikes that synchronous discard used to cause. Together with discard in /etc/crypttab, that’s the complete chain: Btrfs frees an extent, dm-crypt passes the discard through, the SSD learns that the blocks are unused. Fedora additionally enables fstrim.timer, which runs a weekly fstrim over all mounted filesystems. For Btrfs with async discard it’s redundant, but for the ext4 /boot and the ESP it isn’t.
And on RHEL?
RHEL removed Btrfs in version 8 and never brought it back. The default there is XFS on LVM: a volume group, logical volumes for root, swap and optionally home, and XFS on top. XFS is an excellent, very scalable filesystem and supports reflinks, but it has no built-in snapshots, compression or data checksums. Snapshots come from LVM thin pools, or from Stratis, which bundles XFS and thin provisioning behind a simpler interface. If you want a checksumming CoW filesystem on RHEL, you’re in third-party territory, as described in the articles about ZFS on RHEL and bcachefs on RHEL 10.
Memory: Page Cache and Anonymous Pages
Now to the other half. The kernel manages memory in pages of 4 KiB, and for understanding everything that follows, only one distinction matters. Every page a process uses is one of two kinds:
- File-backed pages are copies of something that exists on disk: the contents of files that were read or written, and the code of every running program and shared library, which is just
mmap()ed files. Collectively, they’re the page cache. - Anonymous pages have no file behind them: heap, stack, everything a program allocates with
malloc().tmpfsand shared memory are technically file pages, but behave like anonymous ones, because there’s no disk file behind them either.
The difference matters at the moment the kernel needs memory back:
| File-backed, clean | File-backed, dirty | Anonymous | |
|---|---|---|---|
| Reclaim by | Dropping the page | Writing it to disk, then dropping it | Writing it to swap, then dropping it |
| Cost | Free now, a disk read later if needed again | A disk write | A swap write |
| Without swap | Possible | Possible | Impossible |
Keep the bottom right cell in mind. It’s the reason for the entire second half of this article.
Reading free correctly
free -h
               total        used        free      shared  buff/cache   available
Mem:            29Gi       5.1Gi        19Gi        94Mi       5.6Gi        24Gi
Swap:          8.0Gi          0B       8.0Gi
This is my laptop shortly after booting, with a browser and a few terminals open. used is memory claimed by processes and by the kernel itself that can’t simply be dropped. Most of it is anonymous memory, which could go to swap. The rest is kernel memory like page tables and unreclaimable slab, which can’t go anywhere. buff/cache is the page cache: 5.6 GiB of file contents that the kernel keeps around because the RAM would otherwise sit idle. And available is the number that answers “how much can I still allocate?”. It’s the kernel’s estimate of free memory plus everything it could reclaim without swapping.
On a machine that’s been running for a week, free will be close to zero and buff/cache will have taken everything. That’s not a problem and not a leak. Unused RAM is wasted RAM, and the page cache is given back the instant something else needs it. The only number worth alerting on is available.
/proc/meminfo has the details behind the summary:
grep -E '^(MemTotal|MemAvailable|Cached|AnonPages|Shmem|Dirty|SwapTotal|SwapFree):' /proc/meminfo
MemTotal:       31447104 kB
MemAvailable:   26066684 kB
Cached:          5670400 kB
SwapTotal:       8388604 kB
SwapFree:        8388604 kB
Dirty:              2204 kB
AnonPages:       3512632 kB
Shmem:             95768 kB
3.5 GiB of anonymous memory, 5.6 GiB of page cache, and about 2 MiB of dirty pages waiting to be written. Shmem contains everything in tmpfs filesystems, and on Fedora that includes /tmp. A 4 GiB file in /tmp is 4 GiB of memory that can only be reclaimed by swapping it out.
Writes go to memory first
The page cache also explains why writes seem so fast. A write() copies data into the page cache, marks the pages dirty, and returns. The data reaches the disk later, written by kernel flusher threads once the pages are old enough (30 seconds by default) or once there are too many of them:
sysctl vm.dirty_background_ratio vm.dirty_ratio
# vm.dirty_background_ratio = 10
# vm.dirty_ratio = 20
At 10% of available memory in dirty pages, background writeback starts. At 20%, processes that write are throttled until the disk catches up. An application that needs to know its data is on stable storage has to call fsync(), which is what every database does. It’s also why copying a large file to a slow USB stick “finishes” quickly and then sync or the unmount takes five minutes: the copy was to memory.
Reclaim, and why swap matters
As long as there’s free memory, the kernel hands it out. When free memory drops below a threshold, the kswapd kernel thread wakes up and starts reclaiming in the background: it looks for pages that haven’t been used recently and frees them, by one of the three routes in the table above. If kswapd can’t keep up, processes that allocate memory have to do reclaim themselves before their allocation succeeds (direct reclaim), and that’s when the system starts to feel slow.
Now consider a system without any swap. Anonymous pages can’t be reclaimed at all, so the only thing the kernel can free is page cache. Under growing memory pressure it drops more and more of it, including the pages that hold the code of running programs. Those programs need their code to continue, so the pages are read back from disk, displacing other pages that are needed a moment later. The system spends all of its time reading the same executable pages over and over. The mouse pointer freezes, SSH logins time out, and it can stay in this state for many minutes before the kernel finally concludes that it’s out of memory. That’s thrashing, and it’s the main failure mode of a swapless Linux machine.
So swap isn’t “emergency RAM”. It’s what gives the kernel a choice. With swap, an anonymous page that hasn’t been touched for hours (a background tab, an idle daemon) can be moved out to make room for page cache that’s actually in use.
How the kernel weighs that choice is controlled by vm.swappiness. It’s not a percentage and not a threshold. It’s the relative cost the kernel assumes for bringing back a swapped-out page compared to re-reading a file page, on a scale from 0 to 200. At 100, both count as equally expensive. Fedora uses the kernel default:
sysctl vm.swappiness
# vm.swappiness = 60
A value below 100 says “swapping is more expensive than re-reading files”, which was a safe assumption when swap meant a partition on a rotating disk. It’s much less true for what Fedora uses as swap.
Swap on zram
Since Fedora 33 there’s no swap partition in a default install. Instead there’s the device that has been sitting at the top of the lsblk output all along:
swapon --show
zramctl
NAME       TYPE      SIZE USED PRIO
/dev/zram0 partition   8G   0B  100

NAME       ALGORITHM DISKSIZE DATA COMPR TOTAL STREAMS MOUNTPOINT
/dev/zram0 lzo-rle         8G   4K   80B   12K         [SWAP]
zram is a kernel module that provides a block device whose contents are stored compressed in RAM. Formatted as swap, it gives the kernel a place to put anonymous pages that it wants to evict: the page is compressed and stored in memory, taking a fraction of its original size. Swapping a page out costs CPU time instead of disk I/O, and getting it back takes microseconds.
That sounds like a trick, using memory to save memory. It works because idle anonymous memory compresses very well. Ratios of 3:1 are typical, so evicting 3 GiB of idle pages into zram frees roughly 2 GiB net.
How it’s set up
The device is created by zram-generator, yet another systemd generator. At boot it reads its configuration and produces the units that were visible in part 1’s dependency tree: systemd-zram-setup@zram0.service, which sets the size and runs mkswap, and dev-zram0.swap, which activates it. The entire default configuration on Fedora is two lines:
# /usr/lib/systemd/zram-generator.conf
[zram0]
zram-size = min(ram, 8192)
The device is as large as the installed RAM, capped at 8 GiB. On my 32 GiB laptop that gives the 8 GiB device above.
The most common misunderstanding about zram is that this size is memory taken away from the system. It isn’t. DISKSIZE is the maximum amount of uncompressed data the device accepts. An empty zram device uses practically nothing, as the zramctl output above shows: 12 KiB in total. With 32 GiB of RAM my laptop practically never swaps, so here’s an example of what the same line looks like on a machine that does:
NAME       ALGORITHM DISKSIZE  DATA  COMPR  TOTAL STREAMS MOUNTPOINT
/dev/zram0 lzo-rle         8G  2.9G 812.4M 842.6M         [SWAP]
DATA is how much has been swapped out (2.9 GiB of pages), COMPR is what it compressed to, and TOTAL is the RAM the device really occupies including overhead. Here 2.9 GiB of idle memory cost about 840 MiB, a ratio of roughly 3.5:1. Even a completely full 8 GiB device would use around 2.5 GiB of RAM at that ratio.
The priority of 100 only matters if you add a disk swap as well: the kernel fills swap devices in order of priority, and regular swap devices get negative priorities by default, so zram is used first.
Tuning it
Settings go into /etc/systemd/zram-generator.conf, which replaces the file in /usr/lib:
# /etc/systemd/zram-generator.conf
[zram0]
zram-size = min(ram / 2, 16384)
compression-algorithm = zstd
sudo systemctl daemon-reload
sudo systemctl restart systemd-zram-setup@zram0.service
Restarting the unit swaps everything back in first, so do it when there’s enough free memory. lzo-rle is the kernel’s default algorithm and optimized for speed. zstd compresses noticeably better at a higher CPU cost per page, which is usually a good trade on machines with little RAM and a bad one on machines that swap heavily under load. This is also the place to pick up vm.swappiness again. Fedora keeps the kernel default of 60, even though that value encodes the assumption that swap is slower than re-reading files, and swapping to zram is the faster of the two. Some zram-only setups therefore raise it to somewhere between 100 and 180, so the kernel prefers compressing cold anonymous pages over evicting page cache that’s in use:
# /etc/sysctl.d/99-swappiness.conf
vm.swappiness = 150
sudo sysctl --system
Whether that helps depends on the workload. On a machine with plenty of RAM you won’t notice a difference. On a small machine that lives in its swap, it’s worth an experiment, with PSI (see below) as the measurement.
To switch zram off, create an empty /etc/systemd/zram-generator.conf or remove the zram-generator-defaults package.
When would you still want disk swap? There are two cases. The first is hibernation: the memory image has to survive power-off, and zram obviously can’t hold it. Fedora doesn’t set up hibernation by default, and with Secure Boot active, kernel lockdown restricts it as well. The second is a workload with a lot of anonymous memory that is truly idle for long periods and doesn’t compress well. A disk swap with lower priority behind zram covers that.
Don’t confuse zram with zswap. zswap is a compressed cache in front of a disk swap device: pages are compressed in RAM first and written to the disk swap when the cache fills up. It needs a real swap device to work. Fedora uses zram and leaves zswap off. Running both is pointless, because zswap would be compressing pages on their way into a device that compresses them again.
On RHEL, none of this is active by default. The installer creates a swap logical volume, and zram-generator is available in AppStream if you want it.
Measuring Memory Pressure: PSI
How do you know whether a system is short on memory? Free memory isn’t the answer, as we’ve seen. Swap usage isn’t either: a full swap with no activity just means some idle pages were moved out long ago. The question that matters is whether processes are losing time because of memory. Since kernel 4.20, there’s a direct measurement for that: Pressure Stall Information.
cat /proc/pressure/memory
some avg10=0.00 avg60=0.00 avg300=0.00 total=25
full avg10=0.00 avg60=0.00 avg300=0.00 total=25
someis the share of time in which at least one task was stalled waiting for memory: doing direct reclaim, waiting for a page to be swapped in, or waiting for evicted file pages to be read back.fullis the share of time in which all non-idle tasks were stalled at once. Nothing productive happened during that time.avg10,avg60andavg300are averages over the last 10, 60 and 300 seconds in percent, andtotalis the accumulated stall time in microseconds.
My laptop has lost 25 microseconds to memory pressure since boot, so there’s nothing to see here. On a machine in trouble, some avg10 climbs into double digits, and a sustained full value above a few percent means the machine is thrashing. The same files exist for cpu and io, and that makes PSI a great first look at any slow system: it tells you in three cat commands which resource processes are waiting for.
PSI is also tracked per cgroup. Every directory below /sys/fs/cgroup/ has its own memory.pressure file, which tells you whether one specific service or one user session is suffering, even when the system as a whole is fine. That per-cgroup view is what the next component is built on.
Out of Memory: The Kernel OOM Killer and systemd-oomd
Reclaim can fail. If every page is in use, the page cache is at its minimum and swap is full, an allocation can’t be satisfied. At that point something has to die.
The kernel’s OOM killer
The kernel’s answer is the OOM killer. It computes a badness score for every process, essentially its memory footprint including swap, adjusted by oom_score_adj, a per-process value between -1000 (never kill) and 1000 (kill first). It then kills the process with the highest score and logs its decision:
# Kills by the kernel OOM killer in the current boot
journalctl -k -b | grep -i -E 'out of memory|oom-kill'

# The score of a process, and its adjustment
cat /proc/$$/oom_score /proc/$$/oom_score_adj
systemd sets these adjustments for you. Unit files can use OOMScoreAdjust=, and important system services ship with negative values so that they’re picked last.
The OOM killer works, and it has two problems. The first is that it acts late. The kernel only invokes it when reclaim has definitively failed, and as described above, a system can spend minutes thrashing before that point. From the kernel’s point of view, it’s still making progress as long as it can drop and re-read page cache. From the user’s point of view, the machine has been dead for a while. The second problem is that it kills one process, chosen by size. That may be one worker of a multi-process application, leaving the rest in a broken state, or a large and innocent process instead of the many small ones that caused the problem.
You can watch the kernel OOM killer in a safe way, confined to a cgroup with a memory limit. This runs tail /dev/zero, which allocates memory until something stops it, in a scope that’s allowed 1 GiB and no swap:
systemd-run --user --scope -p MemoryMax=1G -p MemorySwapMax=0 tail /dev/zero
# Running as unit: run-r3f1c....scope
# Killed

journalctl -k -b | grep -i 'out of memory' | tail -1
# Memory cgroup out of memory: Killed process 48211 (tail) total-vm:1052640kB, anon-rss:1047552kB, ...
The limit applies to the cgroup, so the kernel OOM killer only considers processes inside it. The rest of the system doesn’t notice. How cgroups work is the topic of part 3.
systemd-oomd
Fedora enables a second line of defense that acts earlier: systemd-oomd, a userspace daemon that watches PSI and kills before the system becomes unresponsive. It replaced earlyoom on Fedora Workstation and has been the default on all desktop variants since Fedora 34.
The idea is to act on the symptom that users care about. systemd-oomd doesn’t wait for memory to run out. It monitors the memory pressure of selected cgroups, and when the pressure stays above a limit for long enough, it picks a cgroup below the monitored one and kills everything in it. Fedora’s configuration consists of three small files:
# /usr/lib/systemd/oomd.conf.d/10-oomd-defaults.conf
[OOM]
DefaultMemoryPressureDurationSec=20s

# /usr/lib/systemd/system/system.slice.d/10-oomd-per-slice-defaults.conf
[Slice]
ManagedOOMMemoryPressure=kill
ManagedOOMMemoryPressureLimit=80%

# /usr/lib/systemd/user/slice.d/10-oomd-per-slice-defaults.conf
[Slice]
ManagedOOMMemoryPressure=kill
ManagedOOMMemoryPressureLimit=80%
In words: system.slice (all system services) and every slice of every user’s session are monitored. If the full memory pressure of one of them stays above 80% for more than 20 seconds, meaning its processes were completely stalled for more than 80% of that time, systemd-oomd acts. oomctl shows the live view:
oomctl
Dry Run: no
Swap Used Limit: 90.00%
Default Memory Pressure Limit: 60.00%
Default Memory Pressure Duration: 20s
System Context:
        Memory: Used: 5.1G, Total: 29.9G
        Swap: Used: 0B, Total: 7.9G
Swap Monitored CGroups:
Memory Pressure Monitored CGroups:
        Path: /system.slice
                Memory Pressure Limit: 80.00%
                Memory Pressure Duration: 20s
                Pressure: Avg10: 0.00, Avg60: 0.00, Avg300: 0.00, Total: 21us
                Current Memory Usage: 1.3G
                ...
        Path: /user.slice/user-1000.slice/user@1000.service
                Memory Pressure Limit: 80.00%
                Memory Pressure Duration: 20s
                Pressure: Avg10: 0.00, Avg60: 0.00, Avg300: 0.00, Total: 0
                Current Memory Usage: 6.2G
                ...
        Path: /user.slice/user-1000.slice/user@1000.service/app.slice
                Memory Pressure Limit: 80.00%
                ...
Two details in this output are worth a closer look. “Swap Monitored CGroups” is empty: systemd-oomd also has a second, swap-based trigger (ManagedOOMSwap=), which kills when both memory and swap are more than 90% full. Fedora 45 doesn’t enable it for any unit, so only the pressure-based policy is active. And the limit applies to the pressure of the monitored cgroup, not to the whole machine, so a user session that’s thrashing gets dealt with even while system services still run fine.
Who gets killed
When the limit is exceeded, systemd-oomd looks at the cgroups below the monitored one and picks the one with the most reclaim activity, which is the one the kernel is working hardest to squeeze memory out of. It then sends SIGKILL to every process in that cgroup.
This is where the desktop integration pays off. GNOME and KDE start every application in its own systemd scope below app.slice:
systemd-cgls --user-unit app.slice | head -20
So “the cgroup with the most reclaim activity” is a whole application: all processes of the browser, or the IDE together with its language servers. That’s a much more sensible unit to kill than a single PID. It also means the kill is clean from the system’s point of view. The application is gone completely, not left half alive.
The decision shows up in the journal. My laptop has never had a systemd-oomd kill, so this is an example of what such a message looks like, not a capture:
journalctl -u systemd-oomd -b
systemd-oomd[1423]: Killed /user.slice/user-1000.slice/user@1000.service/app.slice/app-org.mozilla.firefox-b1f0....scope due to memory pressure for /user.slice/user-1000.slice/user@1000.service/app.slice being 84.12% > 80.00% for > 20s with reclaim activity
The flip side is everything that isn’t cleanly separated into cgroups. Depending on the terminal emulator, all commands started in one terminal window may share a single scope. If a compiler run in such a window eats all the memory, systemd-oomd kills the scope, and the terminal with all its tabs goes with it. The fix is to put heavy jobs into their own scope, ideally with a limit of their own, so they get throttled and killed alone:
systemd-run --user --scope -p MemoryHigh=12G -p MemoryMax=16G make -j16
Individual units can also be protected. ManagedOOMPreference=avoid in a unit tells systemd-oomd to pick it only when there’s no other candidate, and omit takes it out of the selection completely. Use both sparingly: every unit that’s exempt makes it more likely that something else gets killed in its place.
How the pieces work together
Here’s the whole sequence on a default Fedora desktop when an application starts eating memory:
memory fills up
      │
      ▼
kswapd reclaims: drops cold page cache,
compresses idle anonymous pages into zram        ← invisible, the normal case
      │
      ▼
zram fills, reclaim gets harder,
processes stall in direct reclaim                ← PSI "some" rises, things feel slow
      │
      ▼
"full" pressure in the session > 80% for 20 s
systemd-oomd kills the busiest app cgroup        ← one application dies, desktop survives
      │
      ▼
(only if that didn't happen or didn't help)
allocation fails, kernel OOM killer picks
the process with the highest oom_score           ← last resort
zram plays a second role in this chain besides saving memory. It buys time. With swap, memory pressure builds up gradually and measurably, which gives systemd-oomd a window to react. Without swap, a system goes from “fine” to “livelocked” so quickly that a userspace daemon may not even get scheduled in time. That’s why the systemd-oomd documentation strongly recommends having swap, and why Fedora introduced zram first and systemd-oomd one release later.
On servers, the picture is different. RHEL ships systemd-oomd but doesn’t enable it, and that’s a defensible default. A database server with a carefully sized buffer pool doesn’t want a daemon making kill decisions based on pressure heuristics. There, explicit MemoryMax= and MemoryHigh= limits per service, with the kernel OOM killer acting inside the cgroup that exceeded its limit, are the more predictable tool.
Cheat Sheet
| Question | Command |
|---|---|
| What block devices exist, and how are they stacked? | lsblk -f |
| Which I/O scheduler does a disk use? | cat /sys/block/<dev>/queue/scheduler |
| What does a device-mapper device do? | sudo dmsetup table |
| Which keyslots and tokens does a LUKS container have? | sudo systemd-cryptenroll <dev>, sudo cryptsetup luksDump <dev> |
| Back up the LUKS header | sudo cryptsetup luksHeaderBackup <dev> --header-backup-file <file> |
| Re-enroll the TPM after a PCR change | sudo systemd-cryptenroll --wipe-slot=tpm2 --tpm2-device=auto --tpm2-pcrs=7 --tpm2-with-pin=yes <dev> |
| What’s mounted where, with which options? | findmnt --real |
| How full is the Btrfs filesystem really? | sudo btrfs filesystem usage / |
| Which subvolumes exist? | sudo btrfs subvolume list / |
| What does compression save? | sudo compsize -x <mountpoint>, once per mount |
| Has the disk returned corrupt data? | sudo btrfs device stats /, sudo btrfs scrub start / |
| How much memory is available? | free -h, column available |
| How well does zram compress? | zramctl |
| Are processes stalling on memory? | cat /proc/pressure/memory |
| What does systemd-oomd monitor? | oomctl |
| Who was killed, and by whom? | journalctl -u systemd-oomd, journalctl -k --grep=oom |
Common Pitfalls
Enrolling a TPM2 key without --tpm2-pcrs=. The default binds to no PCRs. The key is then only tied to the TPM chip, and anything that boots on that machine can unseal it. Always state the PCRs explicitly, and check the result with cryptsetup luksDump, which lists them in the token.
Treating TPM auto-unlock without a PIN as equivalent to a passphrase. It protects a disk that leaves the machine. It doesn’t protect a machine that leaves the building. Use a PIN on anything portable.
Removing the passphrase after enrolling the TPM. Firmware updates, dbx updates and hardware repairs all invalidate the TPM enrollment sooner or later. Keep a passphrase or a recovery key, and keep a header backup offline.
Trusting df on Btrfs. Look at btrfs filesystem usage and watch the unallocated space. Use compsize instead of du when you want to know what’s really on disk.
Running defragment or a full balance as “maintenance”. Defragmenting un-shares snapshot and reflink extents and can multiply disk usage. A full balance rewrites everything for no benefit. Neither is needed on a healthy filesystem.
Putting VM images on CoW without thinking about it. Set chattr +C on the directory before creating images in it, and remember that those files then have no checksums.
Reading the zram size as reserved memory. DISKSIZE is a limit for uncompressed data. Look at TOTAL in zramctl for what the device really costs.
Disabling swap “for performance”. Without swap, the kernel can only reclaim file pages, and the result under pressure is thrashing instead of swapping. It also takes away the reaction time systemd-oomd depends on.
Disabling systemd-oomd because it killed something. It killed something because the session was stalled 80% of the time for 20 seconds. Without it, the same situation ends with a frozen desktop and a later, less targeted kill by the kernel. Put the heavy job into its own scope with a memory limit instead.
Panicking about low free memory. Page cache is supposed to fill the RAM. Monitor available and PSI, not free.
Conclusion
The storage stack is a tower of small, well-defined layers. The block layer turns hardware into numbered sectors. Device mapper builds virtual block devices from tables, and dm-crypt is the one table line that encrypts every sector on my laptop. LUKS2 manages the keys for it, in a header that can hold a passphrase, a TPM2-sealed key and a recovery key side by side. On top of that, Btrfs turns one block device into a pool with subvolumes, snapshots, checksums and compression, and the VFS makes all of it look like one tree of files.
Memory follows a similar logic, with one distinction at its center: file-backed pages can be dropped and re-read, anonymous pages can only go to swap. Fedora’s defaults build on that. zram gives anonymous memory somewhere to go without touching the disk, PSI measures whether processes are actually losing time, and systemd-oomd uses that measurement to kill one application before the whole machine stalls. The kernel’s OOM killer is still there, as the last resort it was always meant to be.
The mental model to keep: keys are wrapped, never used directly, and the TPM only adds real security together with a PIN or a measured, signed boot chain. Free space on Btrfs is about unallocated chunks, and free memory on Linux is about available, not free. And swap isn’t overflow storage. It’s what gives the kernel, and systemd-oomd, room to make good decisions.
Several times in this article, the explanation ended with “that’s a cgroup”. The memory limits, the per-cgroup pressure files, the scopes that systemd-oomd kills, the slices in oomctl. Part 3 picks that up: cgroups v2 and how systemd maps slices, scopes and services onto them, namespaces and capabilities as the building blocks of containers, and how to use all of it to sandbox a service with a handful of lines in a unit file.
References
- Kernel documentation - Multi-Queue Block IO Queueing Mechanism (blk-mq)
- Kernel documentation - Device Mapper - including dm-crypt
- cryptsetup FAQ - covers header backups, discard and much more
- systemd-cryptenroll(1) and crypttab(5)
- UAPI Group - Linux TPM PCR Registry
- Btrfs documentation - especially the chapters on subvolumes, compression and balance
- Fedora Docs - Btrfs
- Kernel documentation - zram and zram-generator
- Fedora Change - SwapOnZRAM and Fedora Change - EnableSystemdOomd
- Kernel documentation - PSI
- systemd-oomd.service(8) and oomd.conf(5)
- Chris Down - In defence of swap: common misconceptions
- RHEL 10 - Managing storage devices and Managing file systems
Comments
You can use your Mastodon or other ActivityPub account to comment on this article by replying to the associated post.
Search for the copied link on your Mastodon instance to reply.
Loading comments...